Builds with Screens

Post your builds with screens to give inspiration to others
5" screen built into one on my Lian Li's fan slots. Used 10mm foamex as the backing to keep it looking as clean as possible. The Pi is mounted to the back of the screen
Hey guys! First post here, set up my little stats display a little while ago and loving it so far.
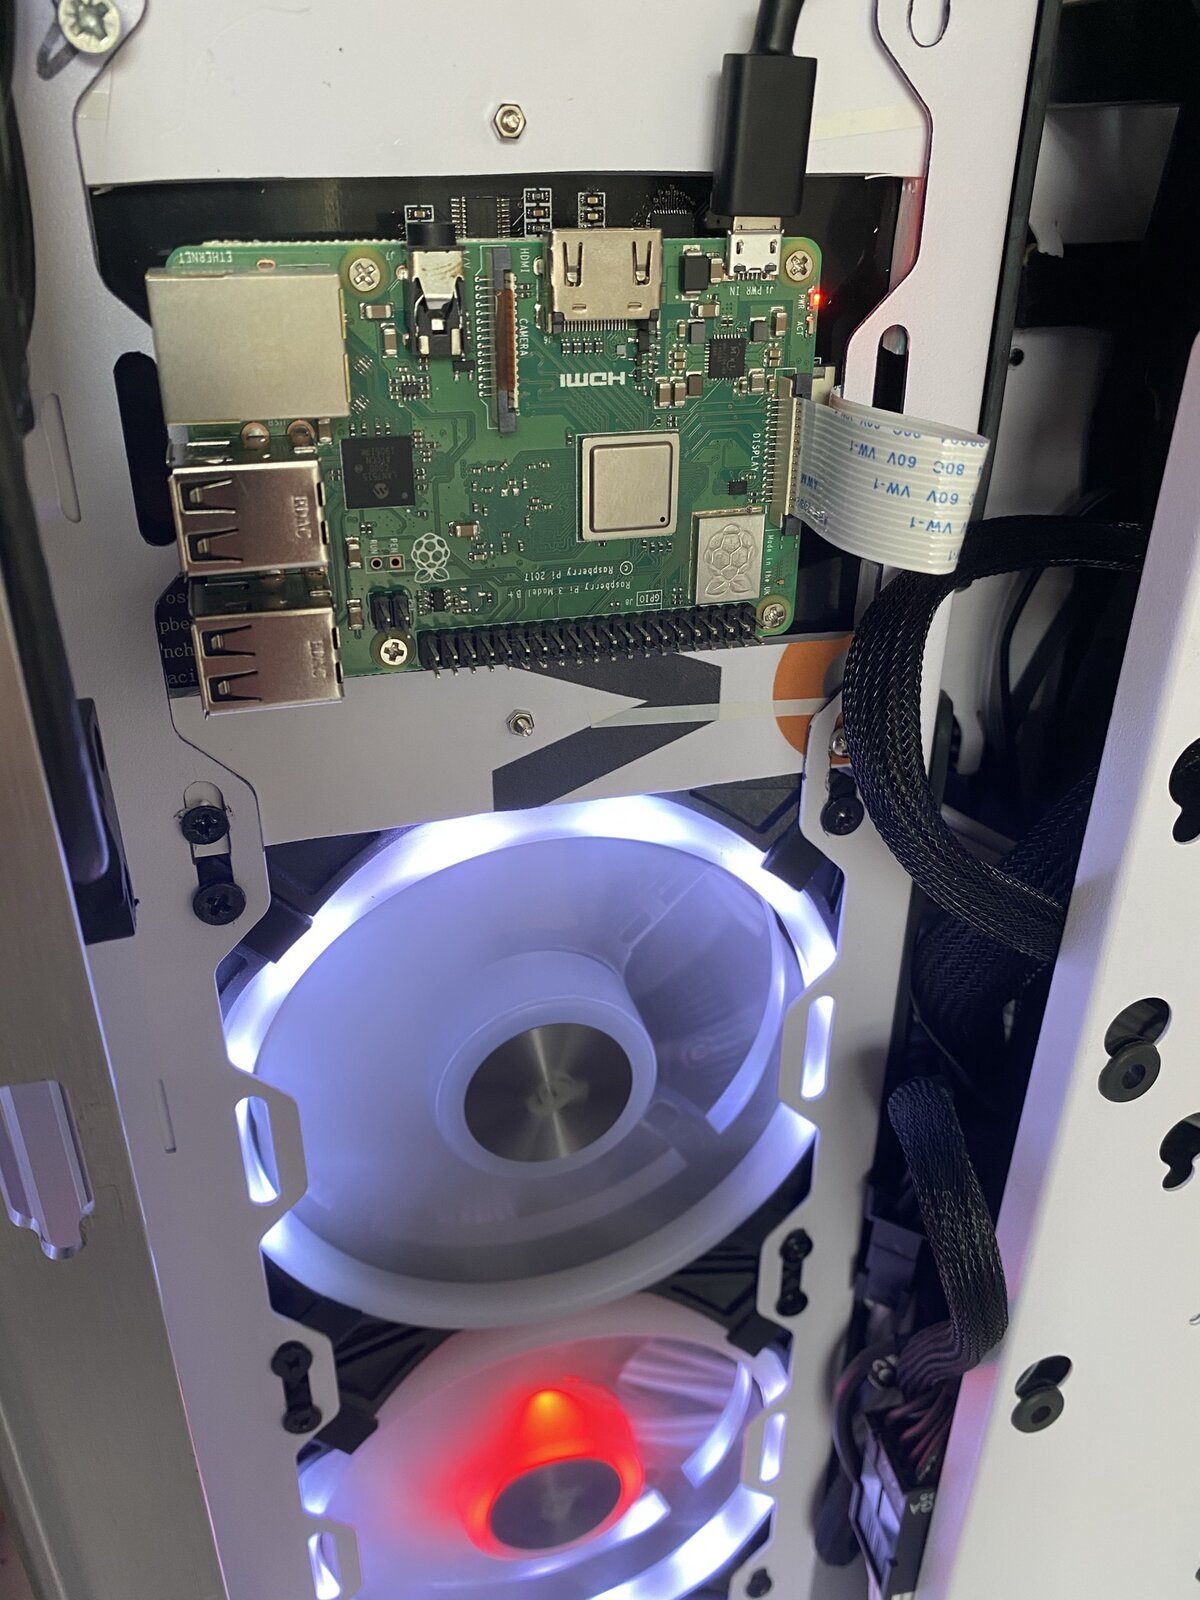
Raspberry Pi 4 Model B with a 3.5" touch screen/case combo (here's a link if you're interested- it's just a cheap one but it gets the job done) mounted in my Corsair 220T case.
I was considering powering through the PSU using the standby line (Thermaltake 650W) but was a bit worried there would be issues with the amount of power, and I also didn't want to wait for an adapter to arrive for a USB-C output, so I've just used the wall adaptor and brought the cable out through the back.
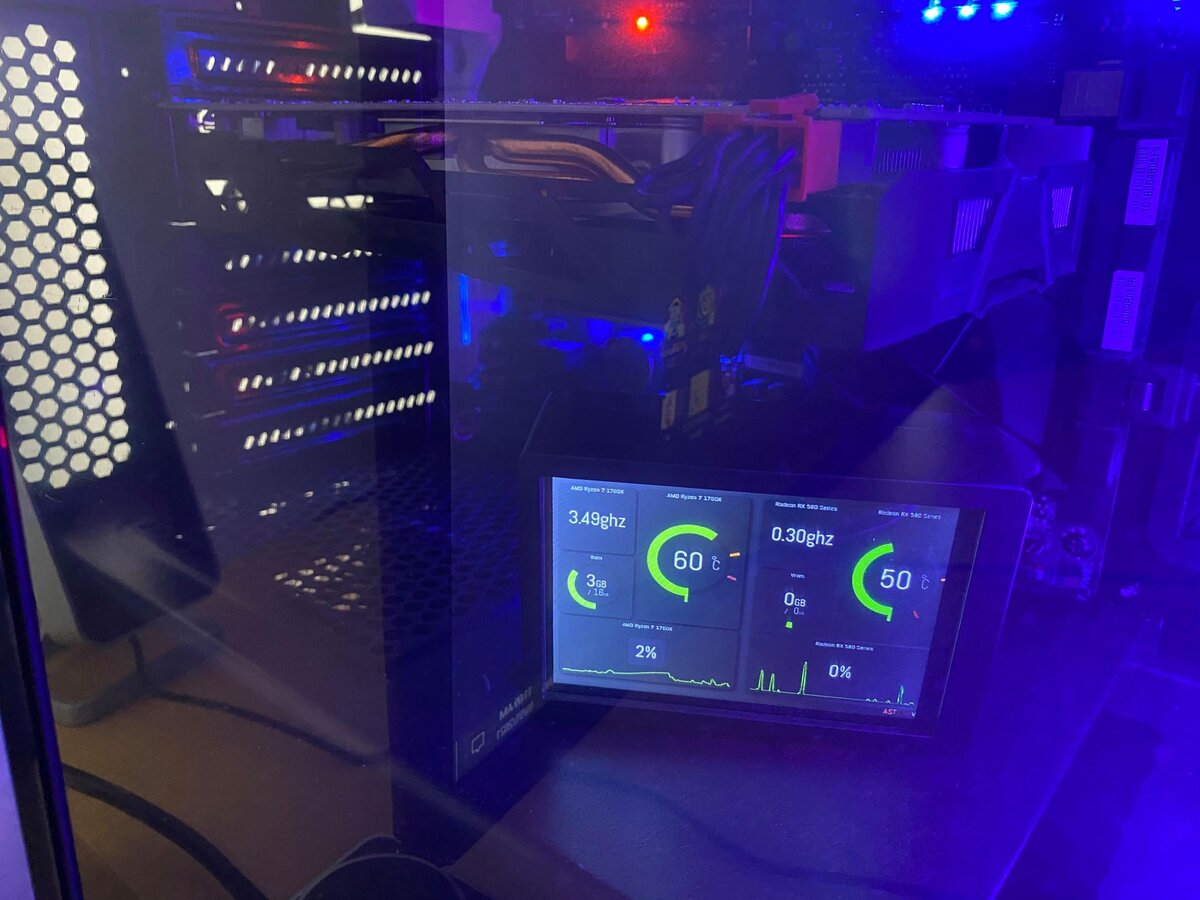
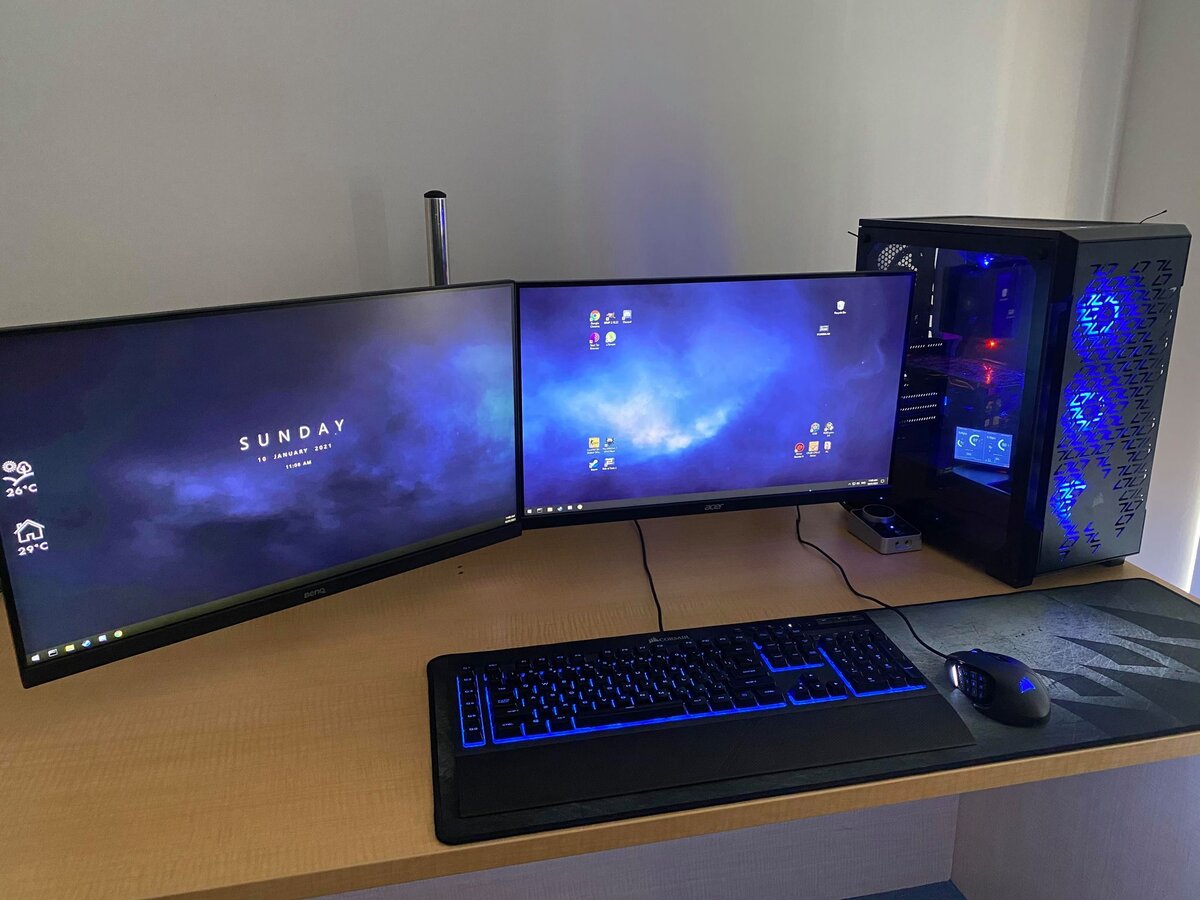
Here's the full build. Right now I'm having a bit of a blue theme, probably because it's a cold colour and I'm in a hot room with no air con. The only brand new components would be the SSD, Pi + screen/case, right monitor, RGB lights and mousepad. Everything else is second hand from Marketplace since it's so much cheaper and I'm on a uni student budget.
The Pi setup was probably harder than it needed to be- I already had Raspbian on it so I wanted to make it automatically open the PC's MoBro link in Chromium when I turned it on, so I ended up setting it up as a kiosk. I used this tutorial from Pi My Life Up (tweaked slightly) to make that happen, and then I just SSH in from the PC anytime I need something changed.
I've also got Rainmeter installed on the PC (that's showing the clock and weather on the left monitor), which is the reason I had HWiNFO installed, but sometimes the sensors just won't work on startup and I'm not sure why. Never had any issues with MoBro connecting to HWiNFO though, even when HWiNFOSharedMemoryViewer couldn't connect, so I'm really happy with that so far.
Quick question regarding screensavers- I've seen this blog post and that looks really exciting, is there a way to get that on a Pi without having to reinstall the OS? If I can get that working on my build without having to reset everything that would be optimal, but I'll install the Mobro image if I have to. Right now I've modified an existing theme so that all the widgets are hidden and it just shows a black screen with grey text, but that has to be manually set before restarting, which is a bit annoying if I forget.
Build specs:
- Motherboard: GIGABYTE GA-AX370-Gaming 5
- GPU: RX 580 Gaming 8GB
- CPU: Ryzen 7 1700x
- RAM: Corsair 8Gb (2x4Gb) DDR4 2400Mhz C14
- PSU: Thermaltake Smart 650W
- Case: Corsair 220T RGB Black
- Keyboard: Corsair K55
- Mouse: Corsair Scimitar
It probably looks like I've gone full Corsair fanboy, but the only deliberate choice I made to get a Corsair branded product was their mousepad, just so it matched the keyboard and mouse. Everything else was just a good deal haha
Thanks for reading about my build, I'm fairly new to PC building and this is all pretty exciting. Let me know if you have any questions :)
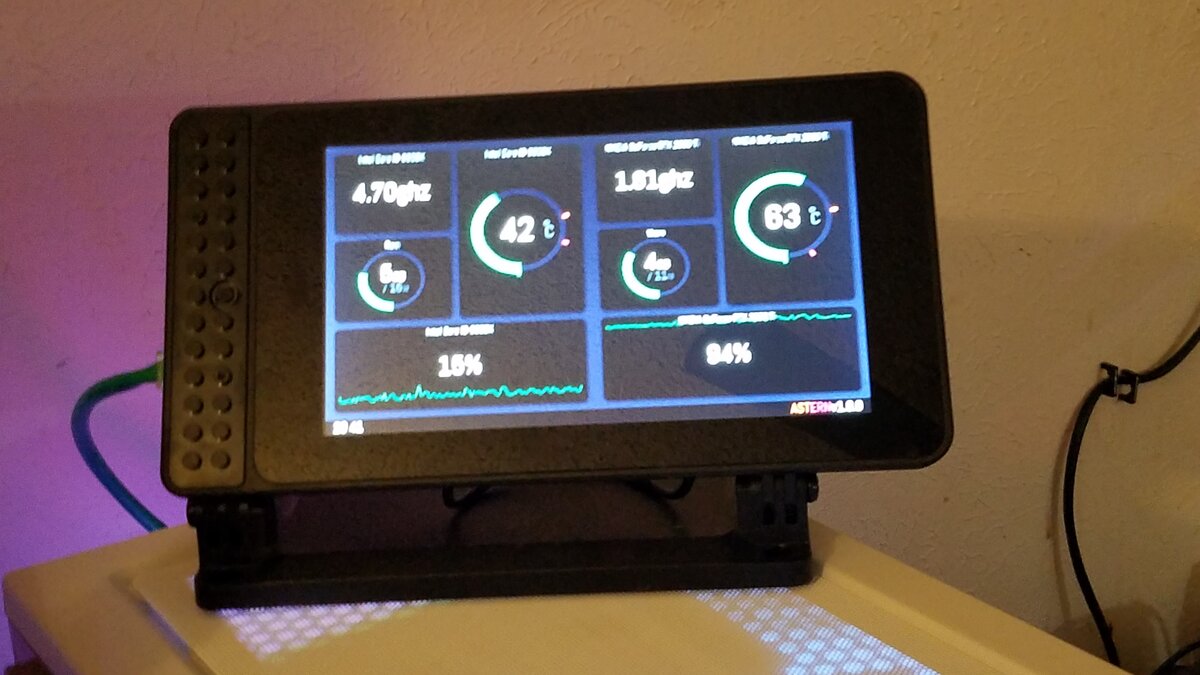
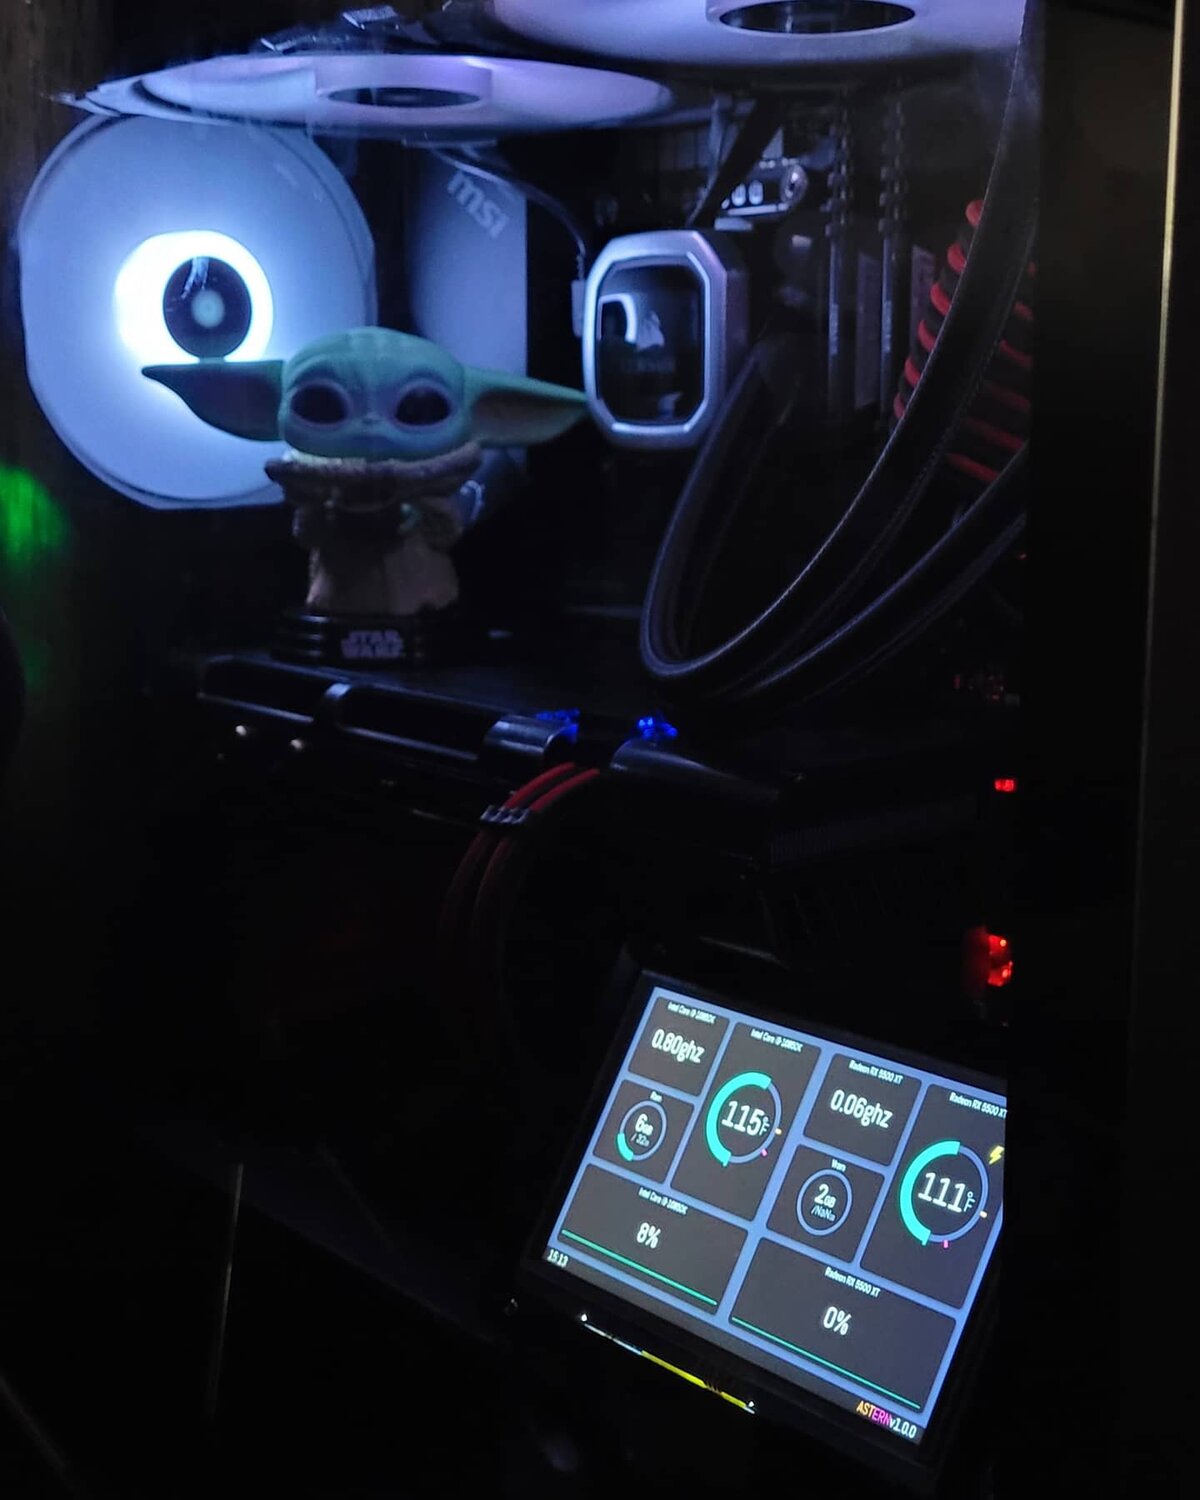
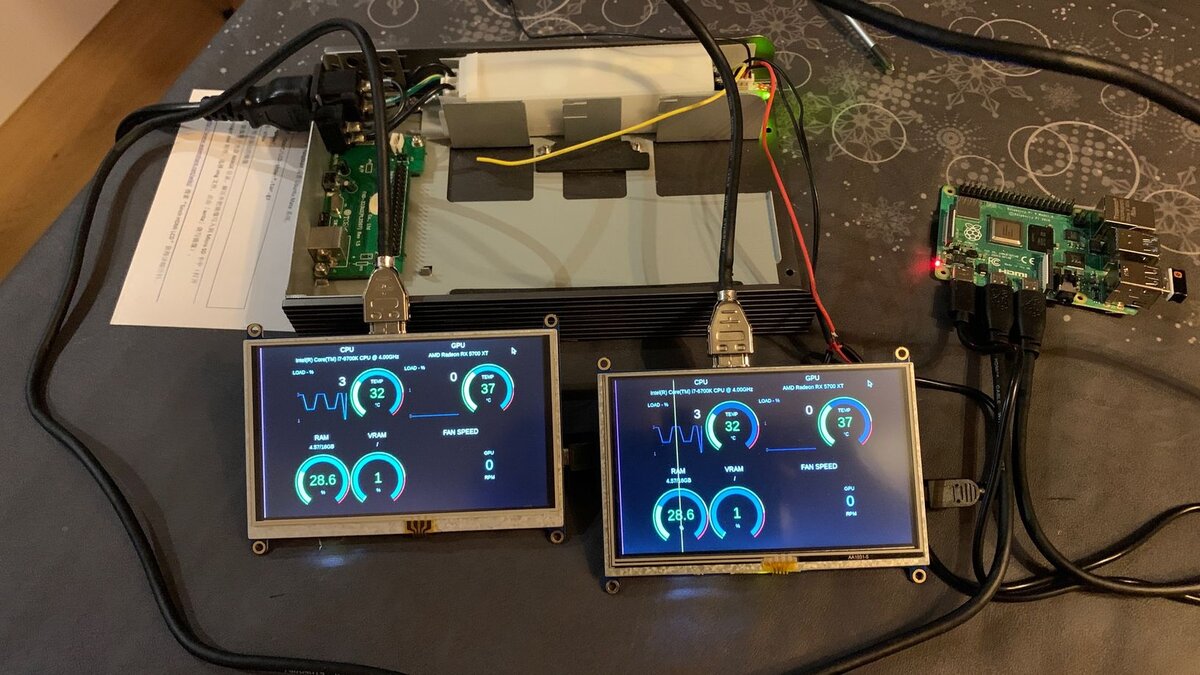
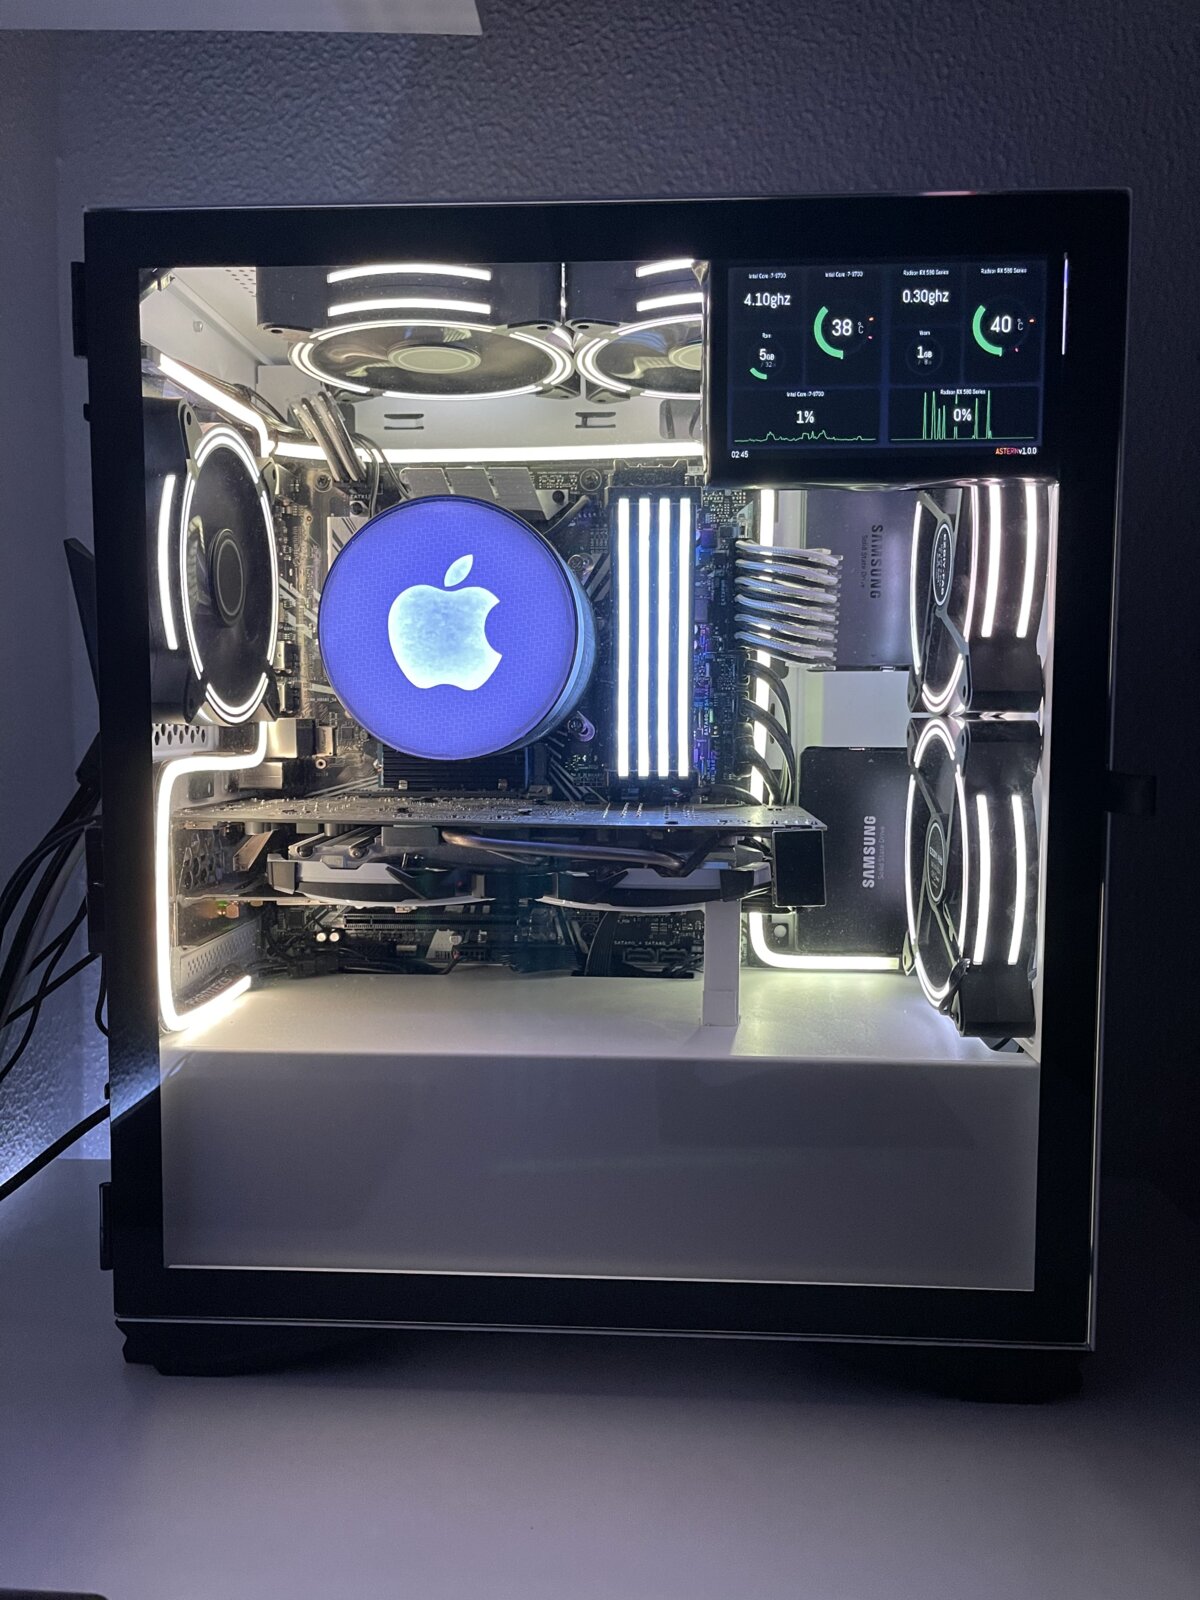
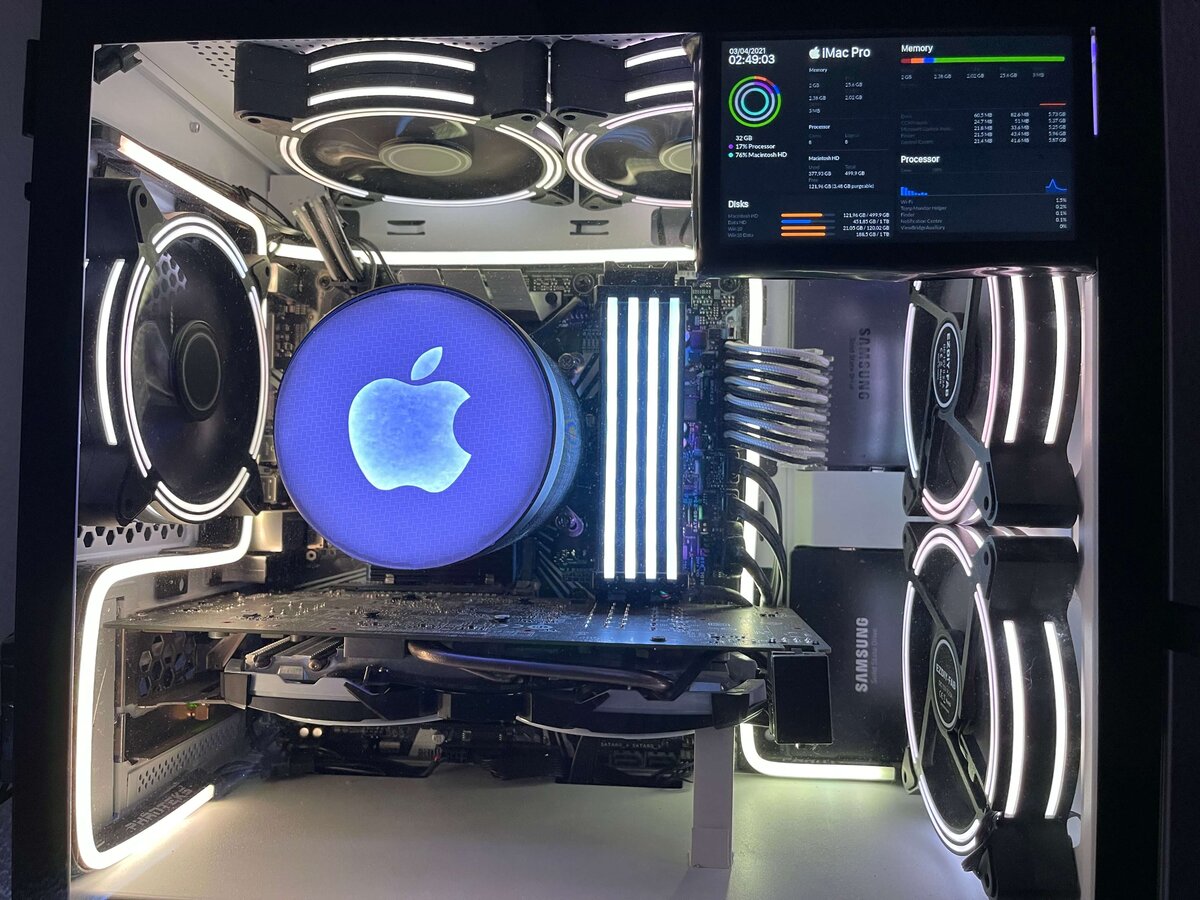
Built the unit with a pi 3b, SmartPi Touch 2 case. Connected the device to the network with ethernet. Utilizing the Astern theme.
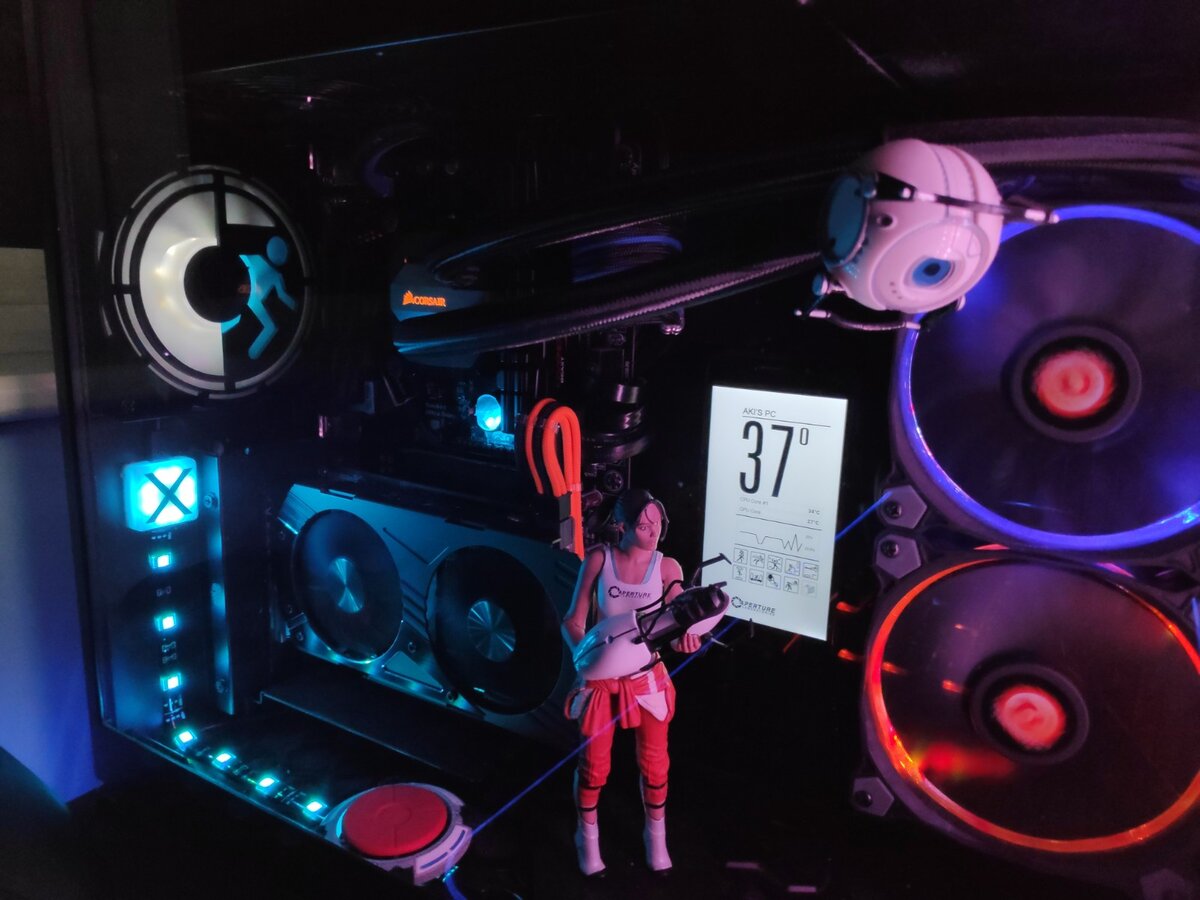
Any Portal Fans?
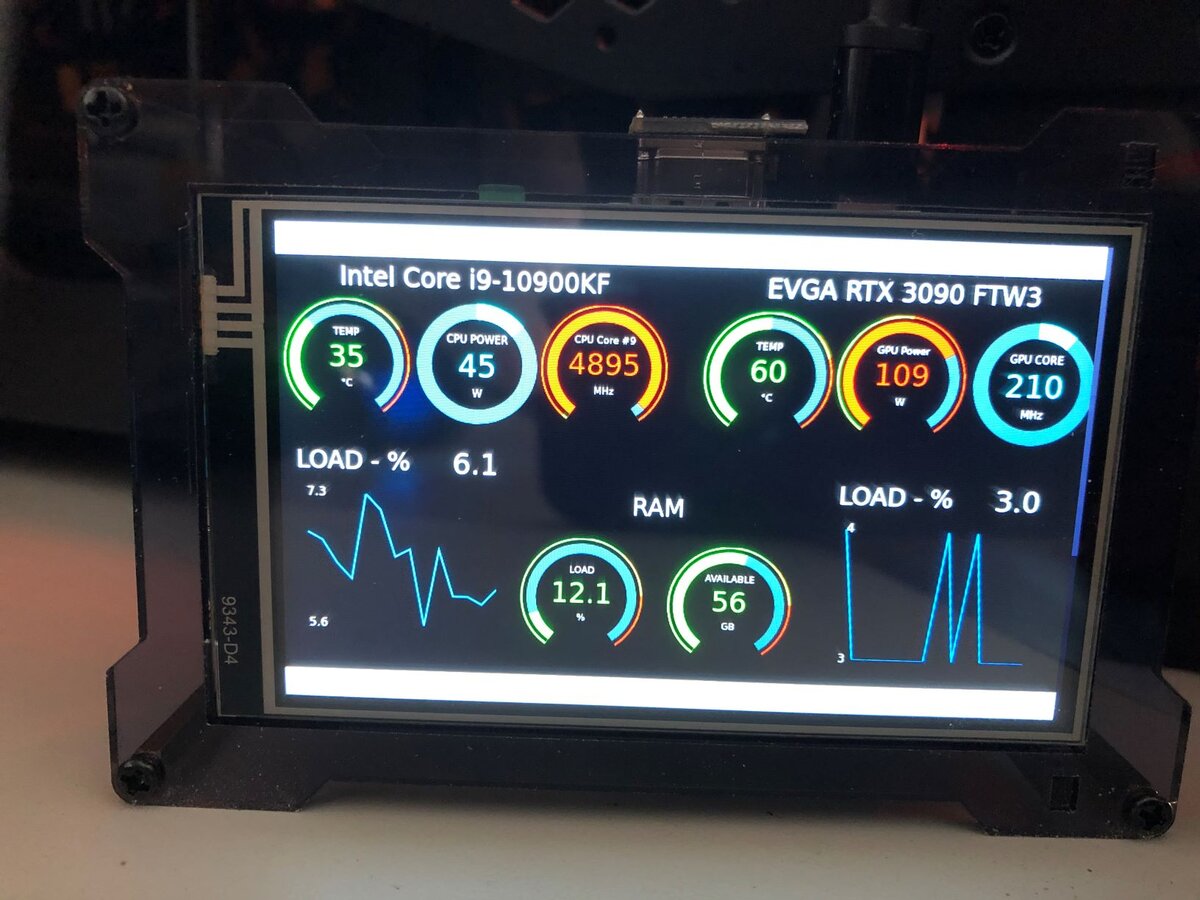
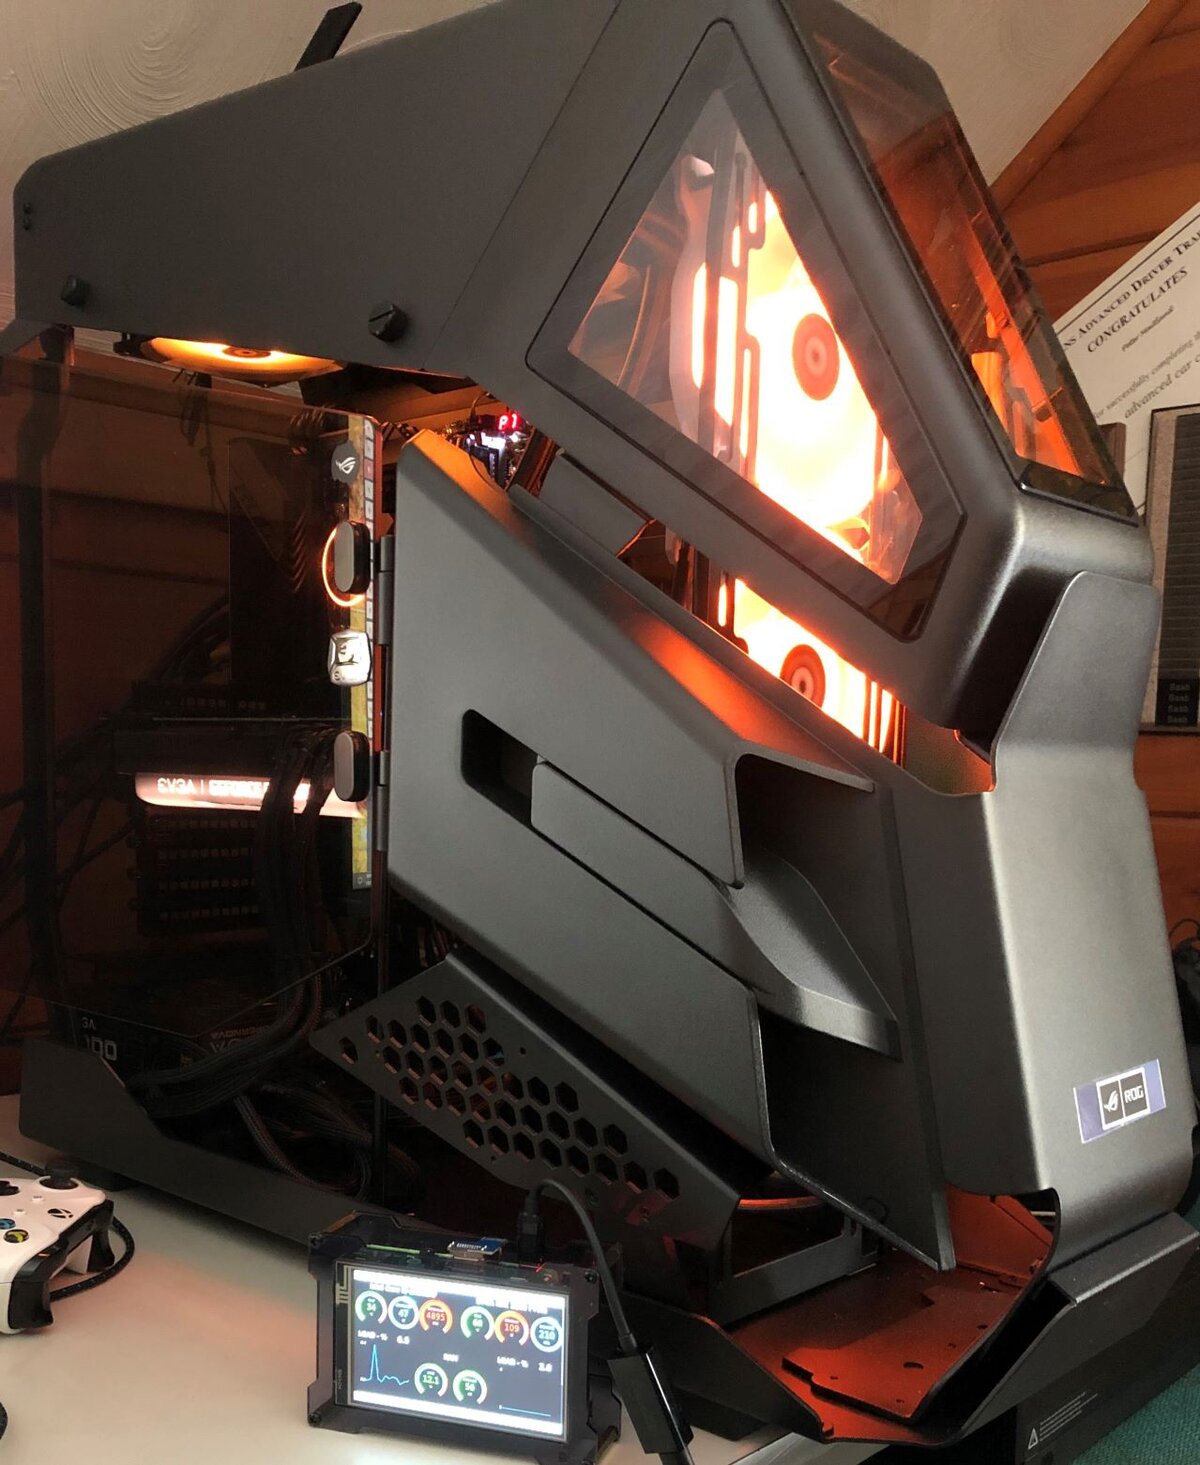
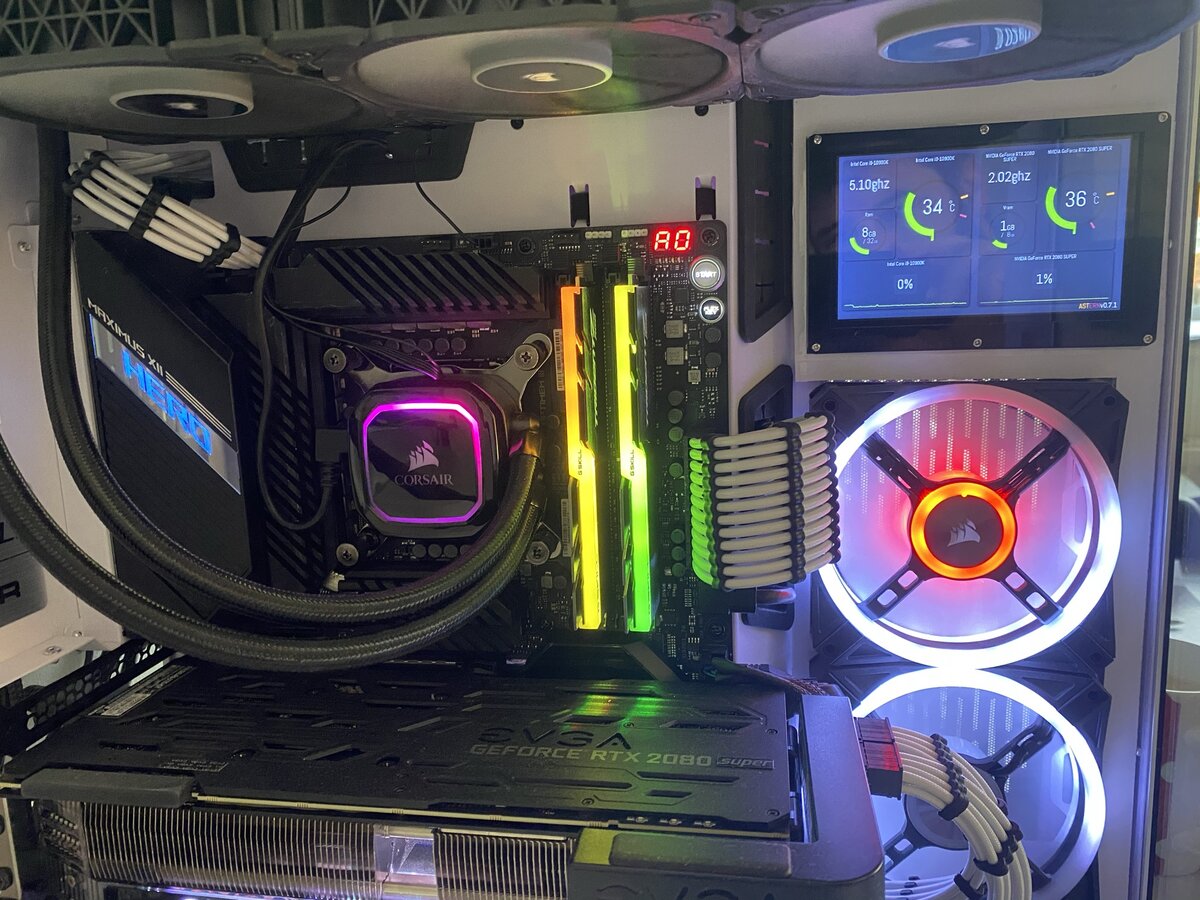
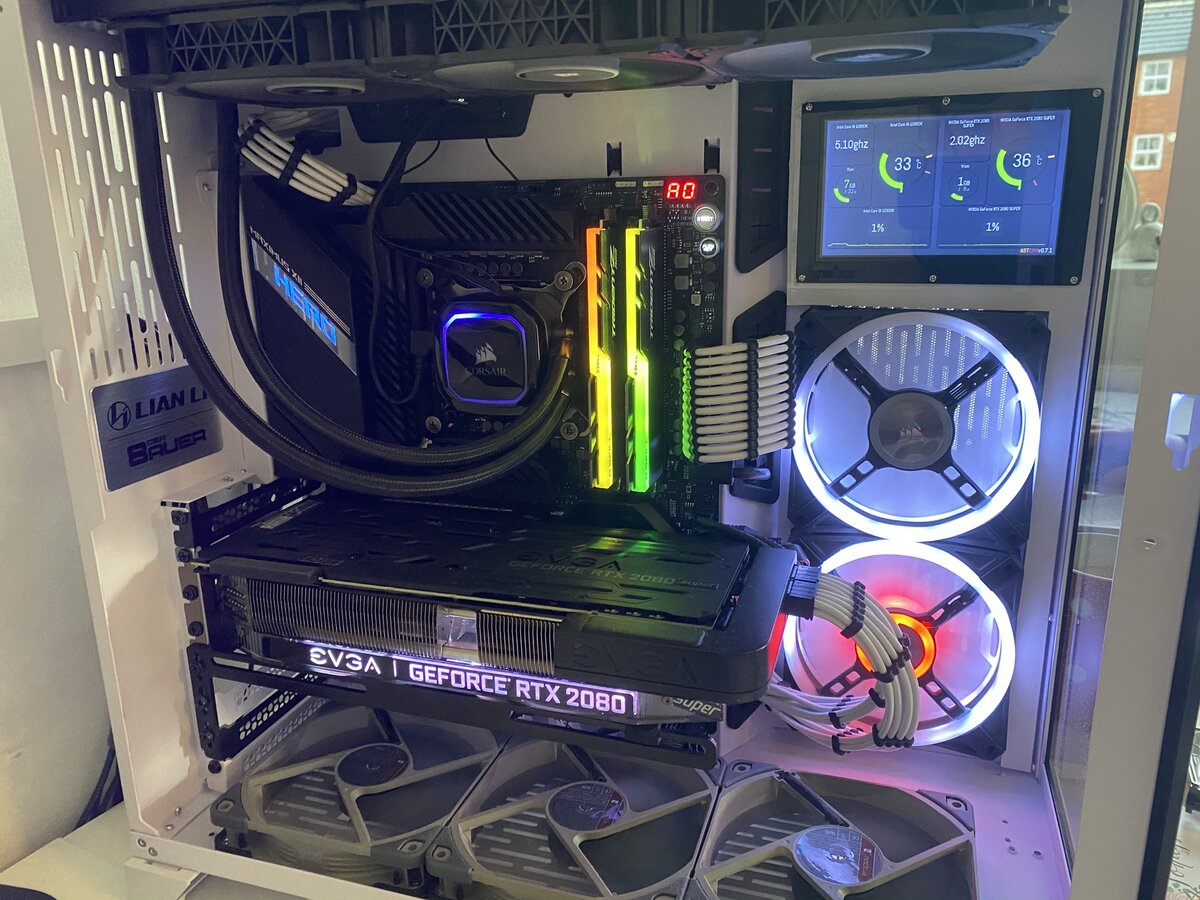
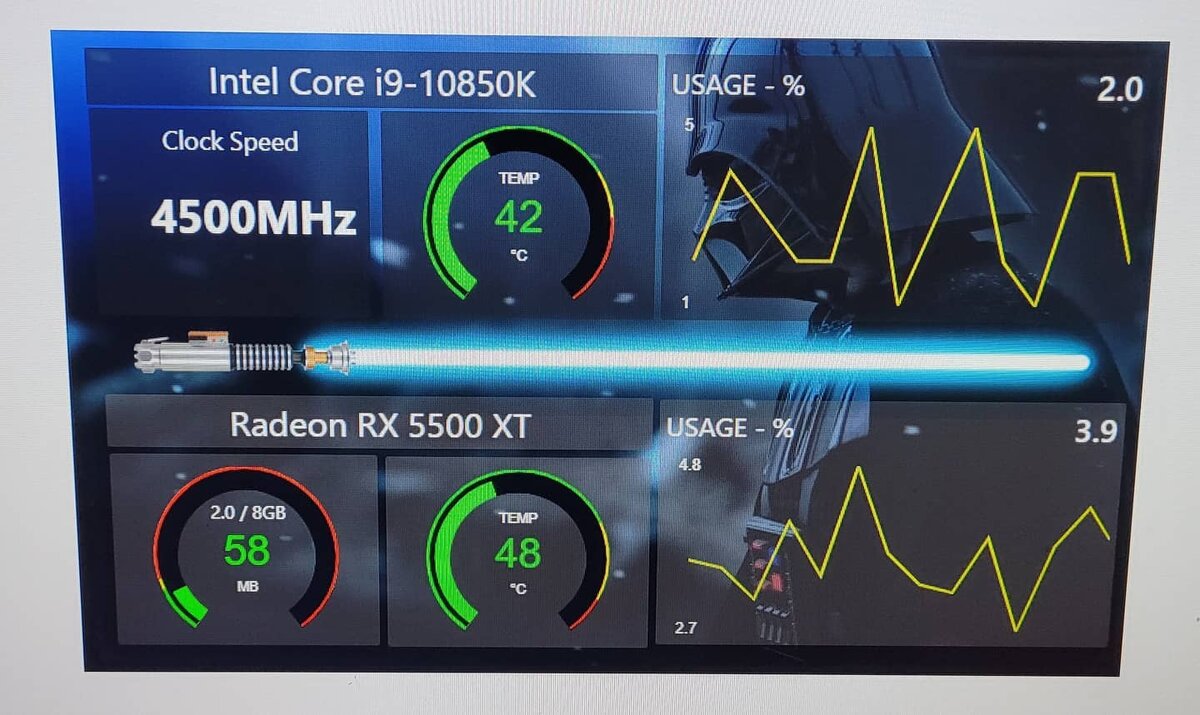
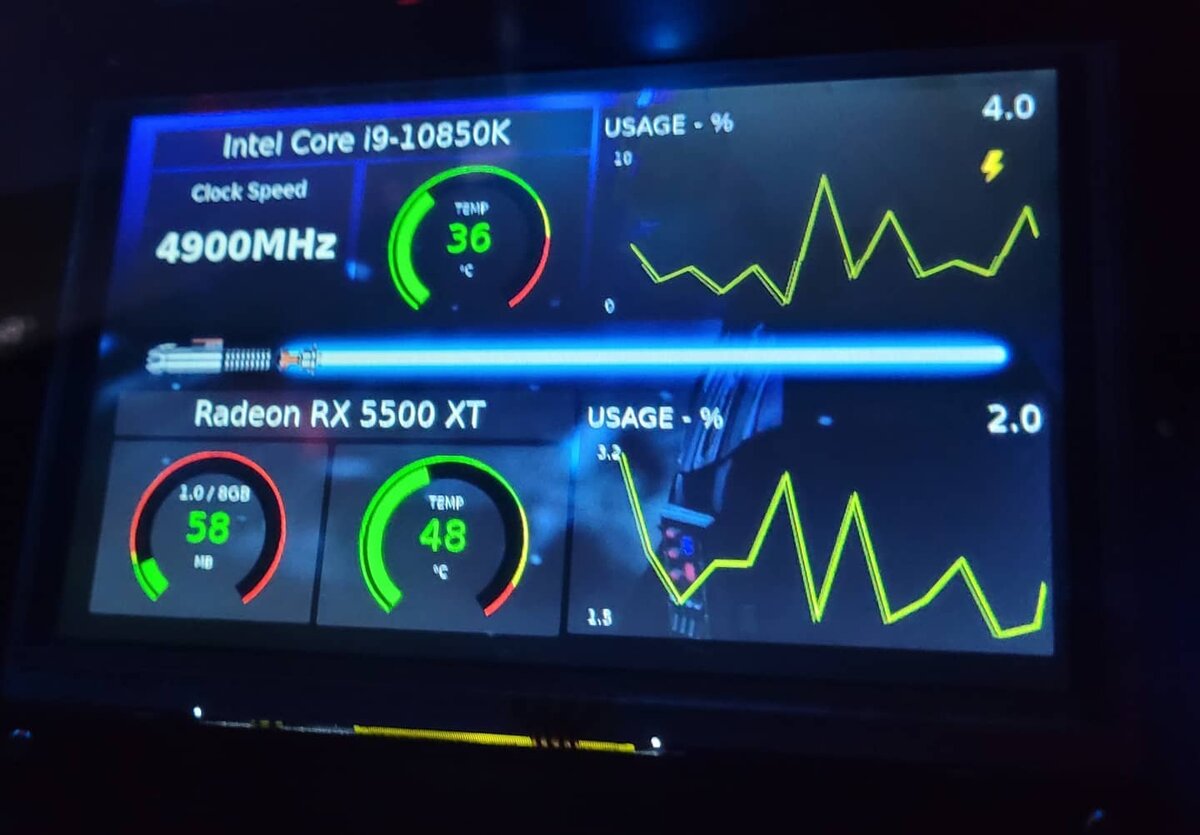
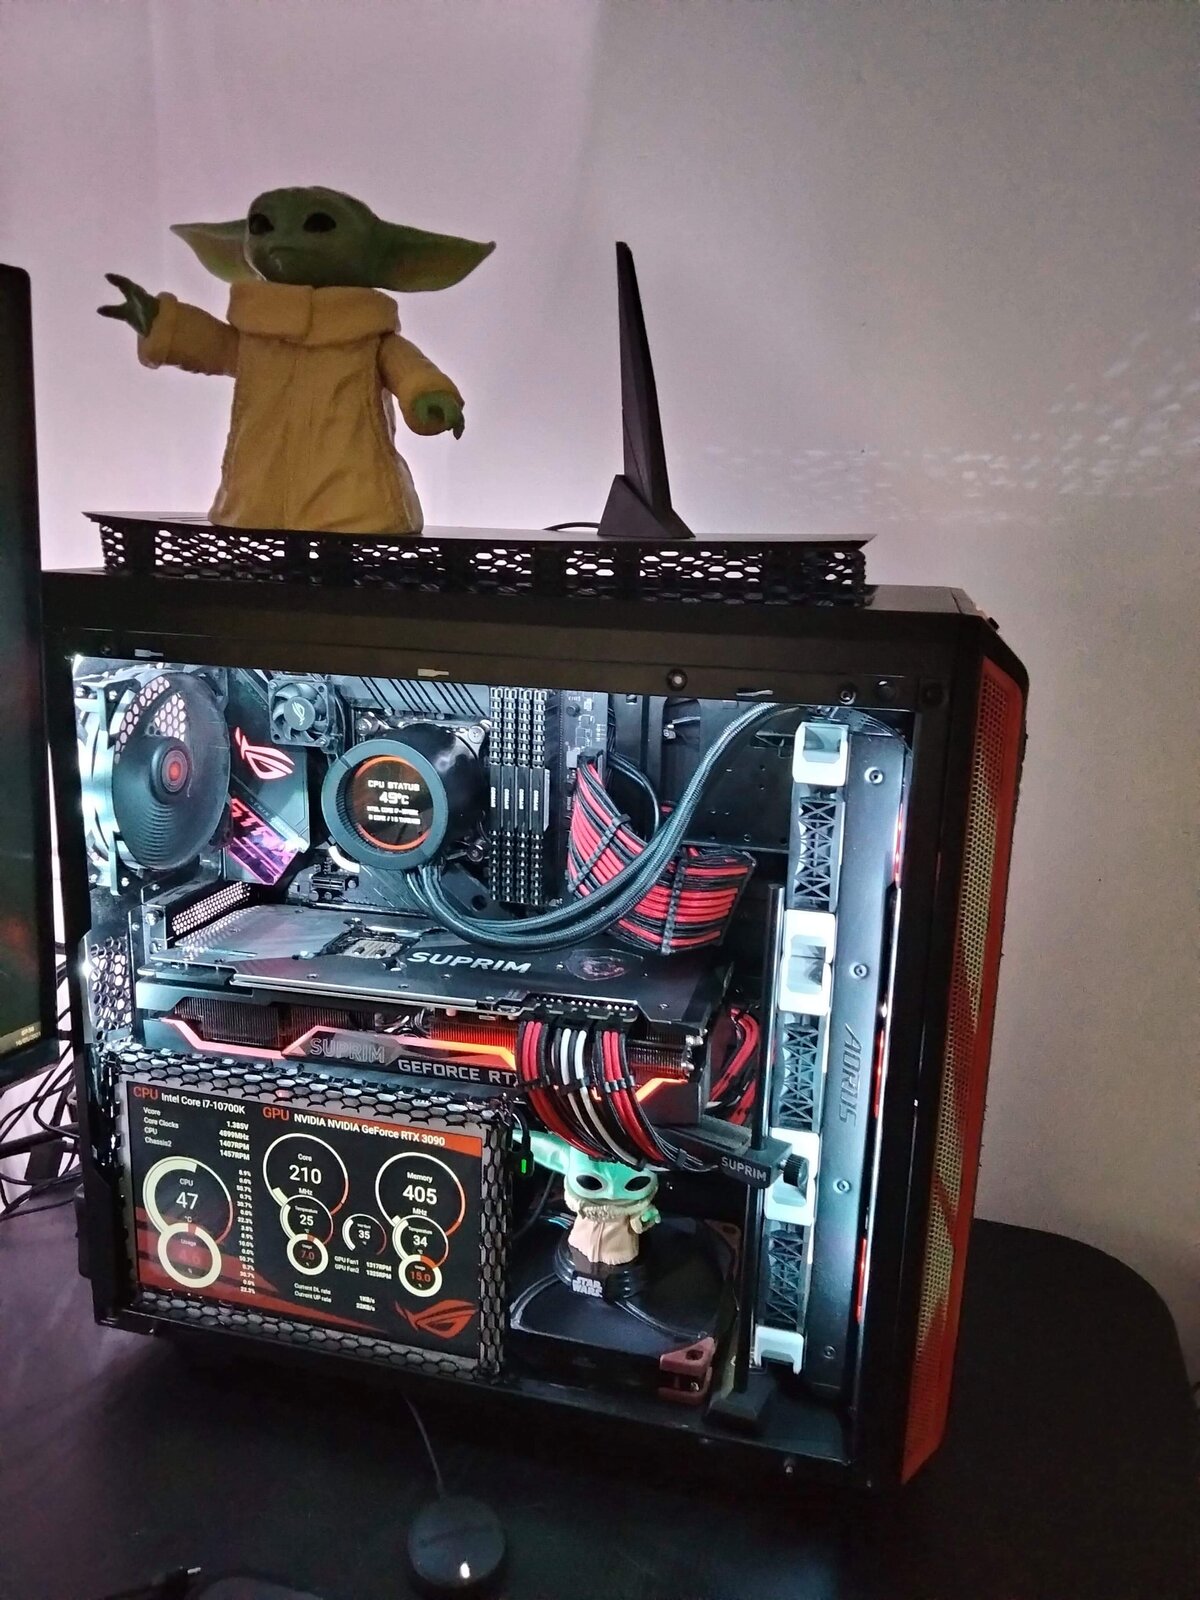
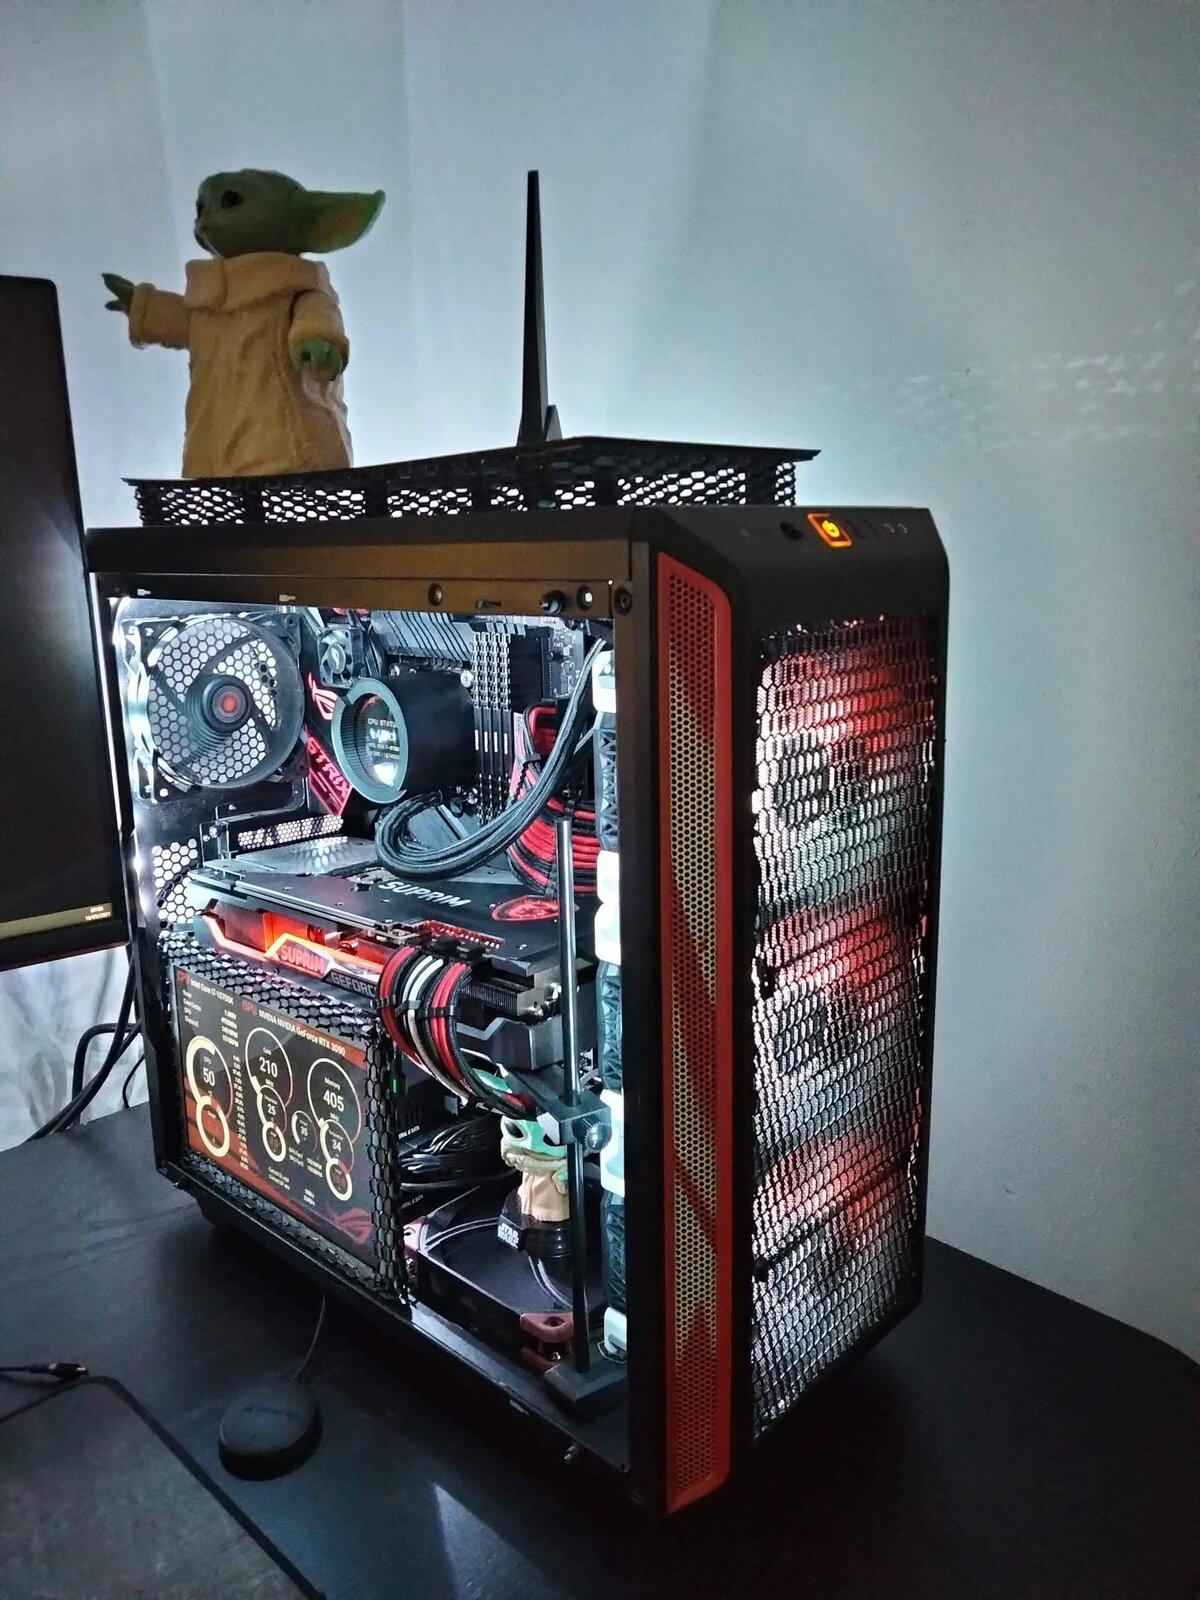
Here's mine…still trying to get the Mhz to Ghz on my machine and the Vram isn't showing right at all (hardcoded 8gb on the Starwars theme). But here it is…
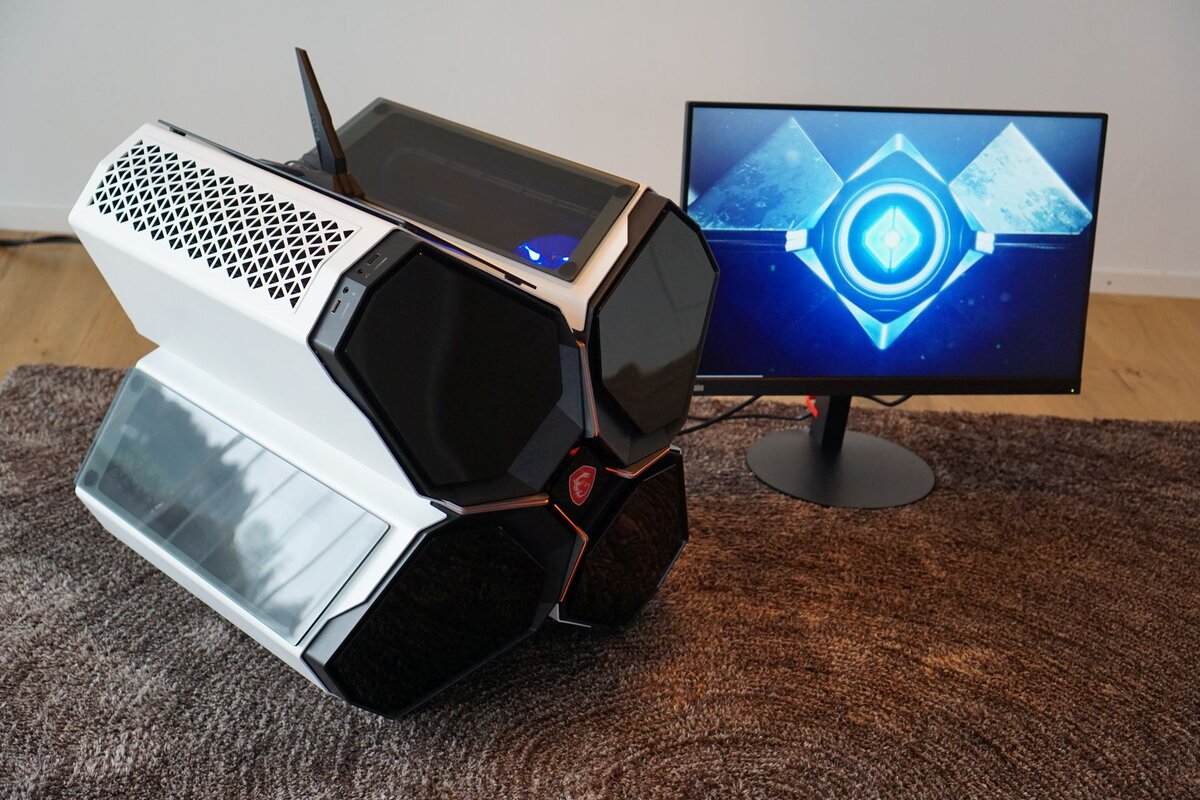
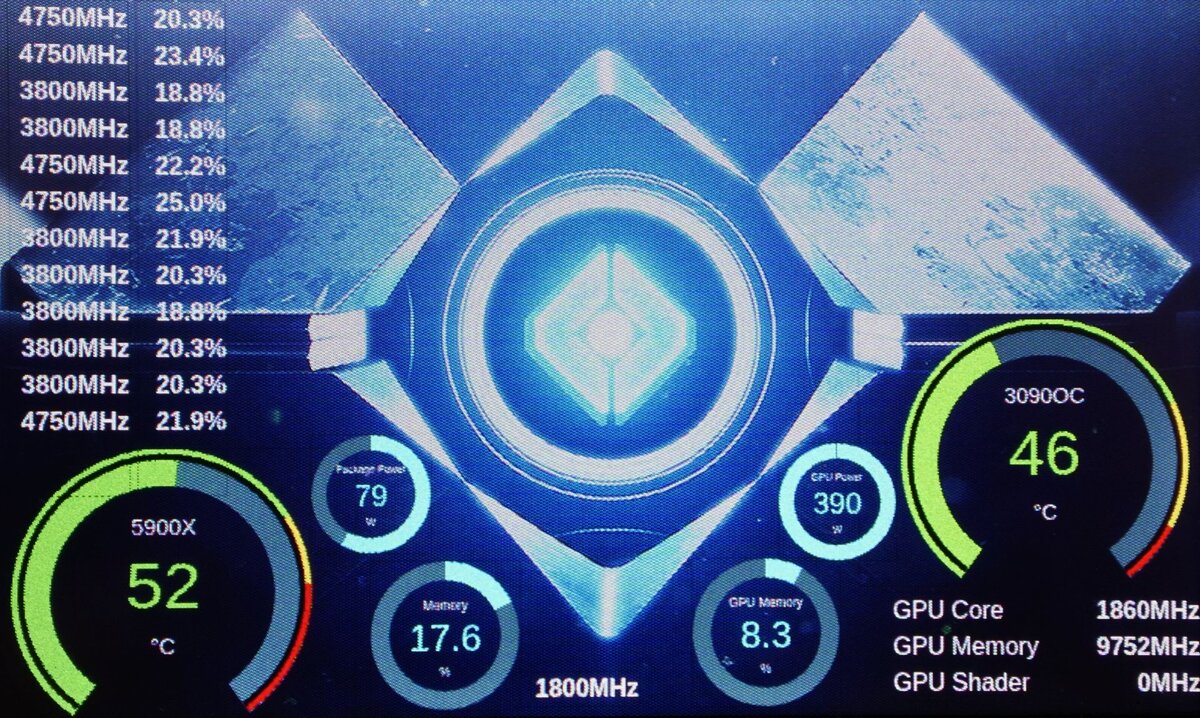
Meet DESTINY
https://builds.gg/builds/destiny-29547
Finally my new build with the Quadstellar case is finished. A more detailed report with many more pictures can be found under the link above.
The sensor displays run on a Pi 4 with standard raspbian distribution on. This is the only way I know to miror the two displays. Then the tweaking according to this forum post started:
https://www.mod-bros.com/en/forum/t/guide-how-to-use-mobro-app-on-normal-raspberry-pi-os-in-desktop-mode-without-mobro-custom-os-image~1267
Some more tweaking to disable the screensaver and to get vpn running. I am really happy with the result. Time ti buy a beer for the Mod-Bros team. Where is that donation link again?

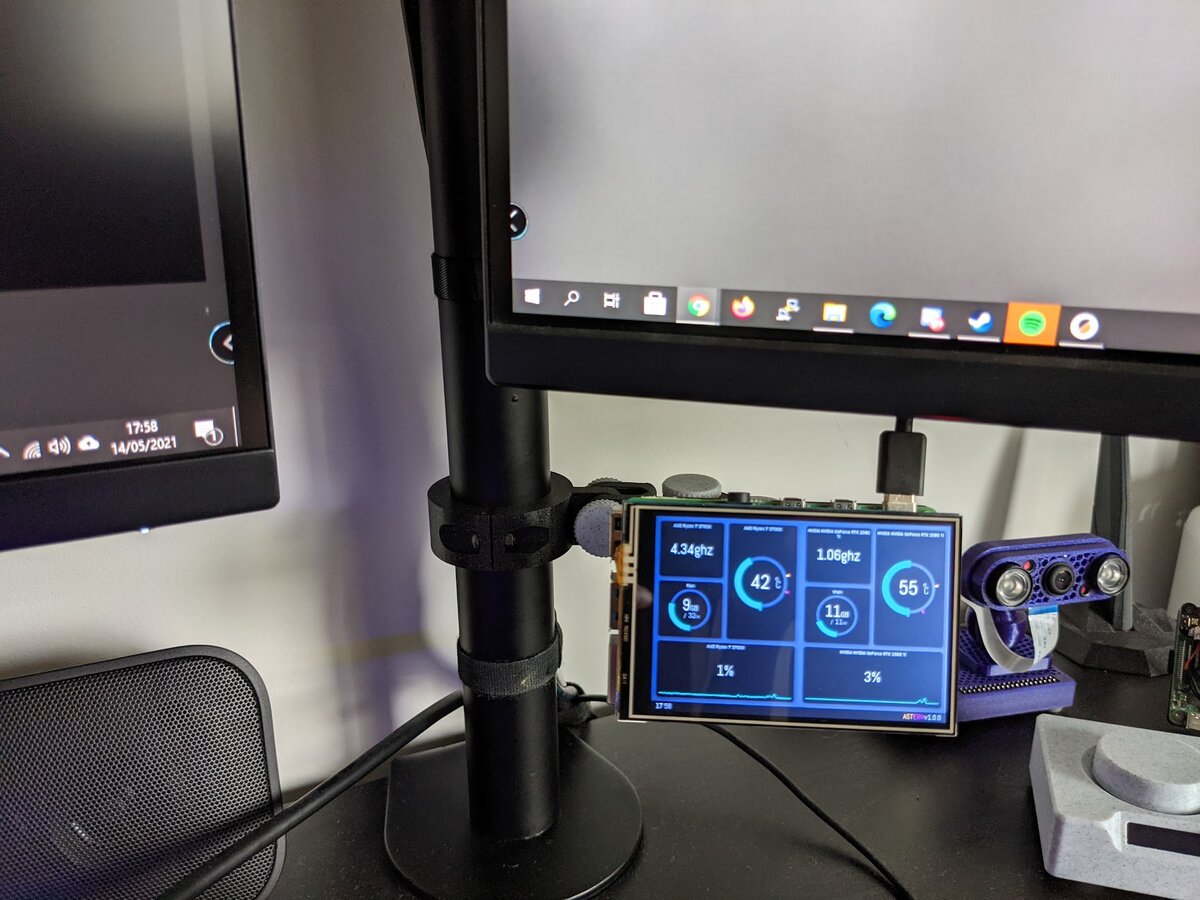
As I've got my PC down beside my desk I can't really fit in the case. So after merging two different 3D files together and a little super glue (was far easier than trying to print the other part) My Pi floats nicely off my monitor arm, powered by the monitor's USB hub.
Hey Guys,
Here is my build with a Lenovo tab M10 (Android)
With root access I could turn it on when power is supplied and macrodroid helped me launch the app upon tablet booting and shutting down when power supply is gone.
@mhuston619 cheers to you Grogu's friend!
Gaming Mode (Astern Theme)
Screen Saver mode
Closer Look (Astern Theme)
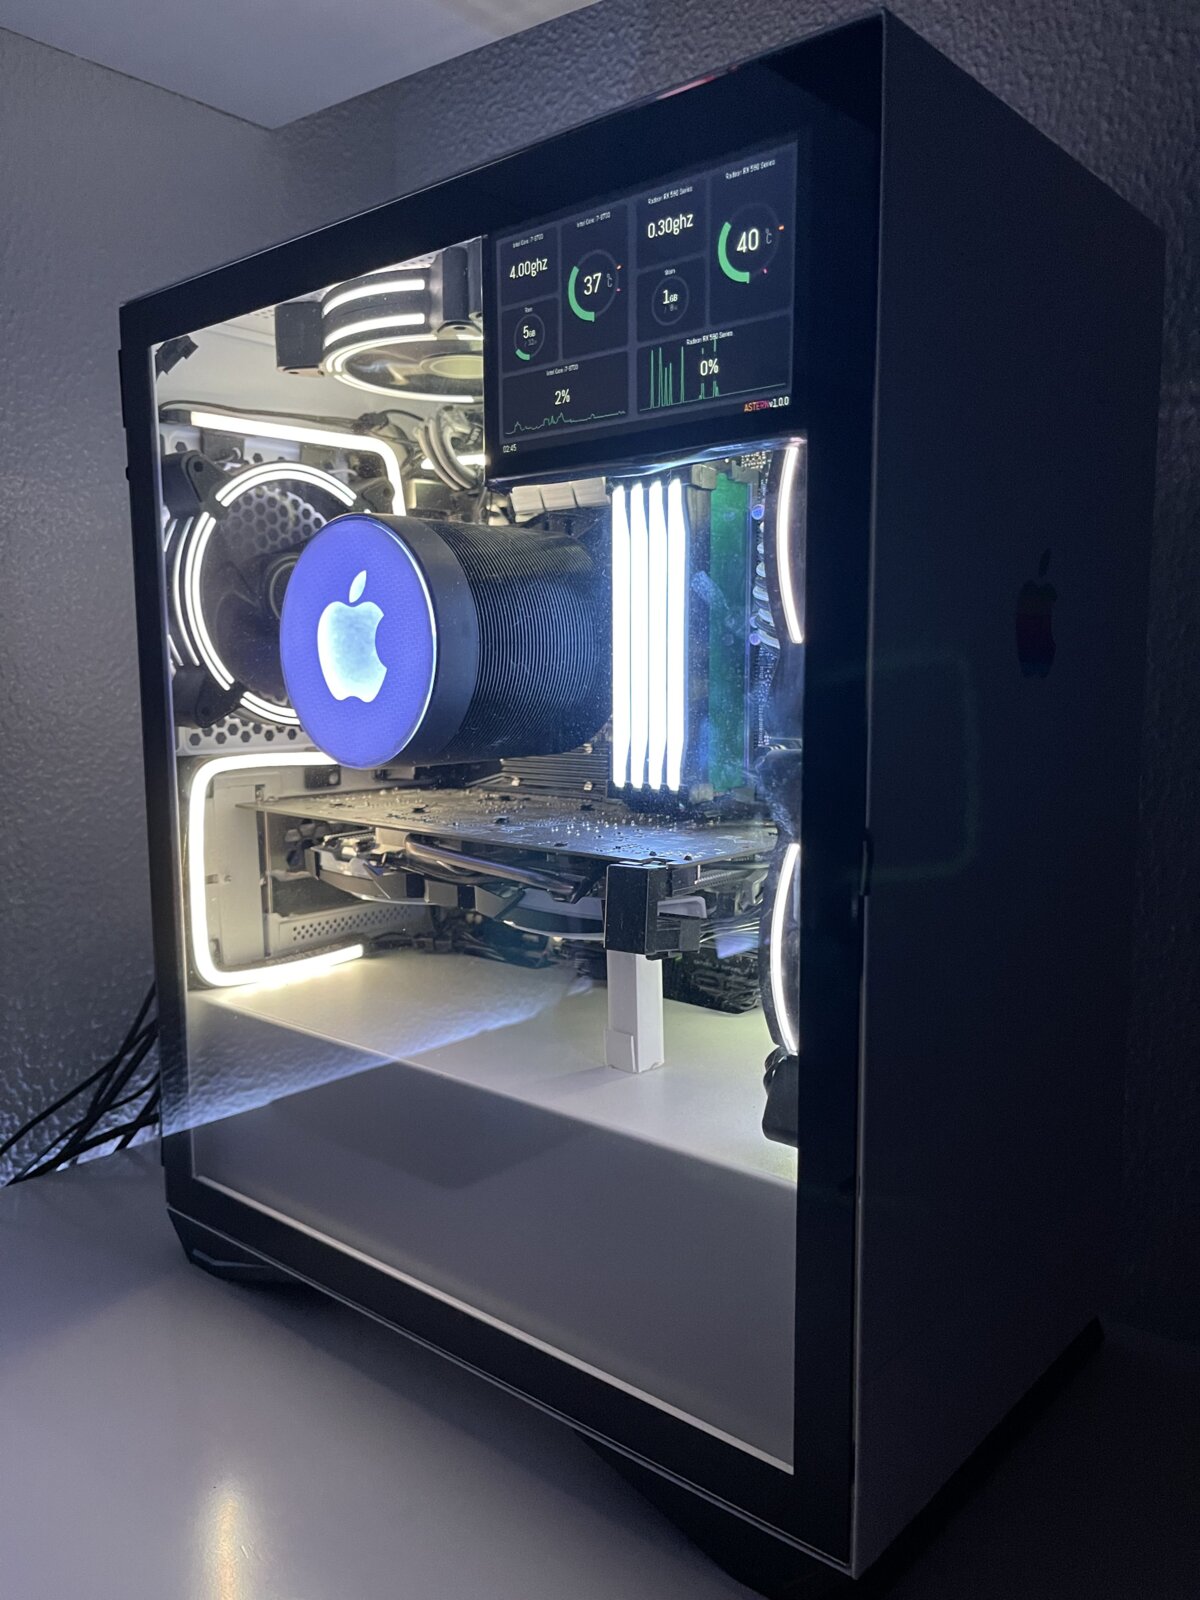
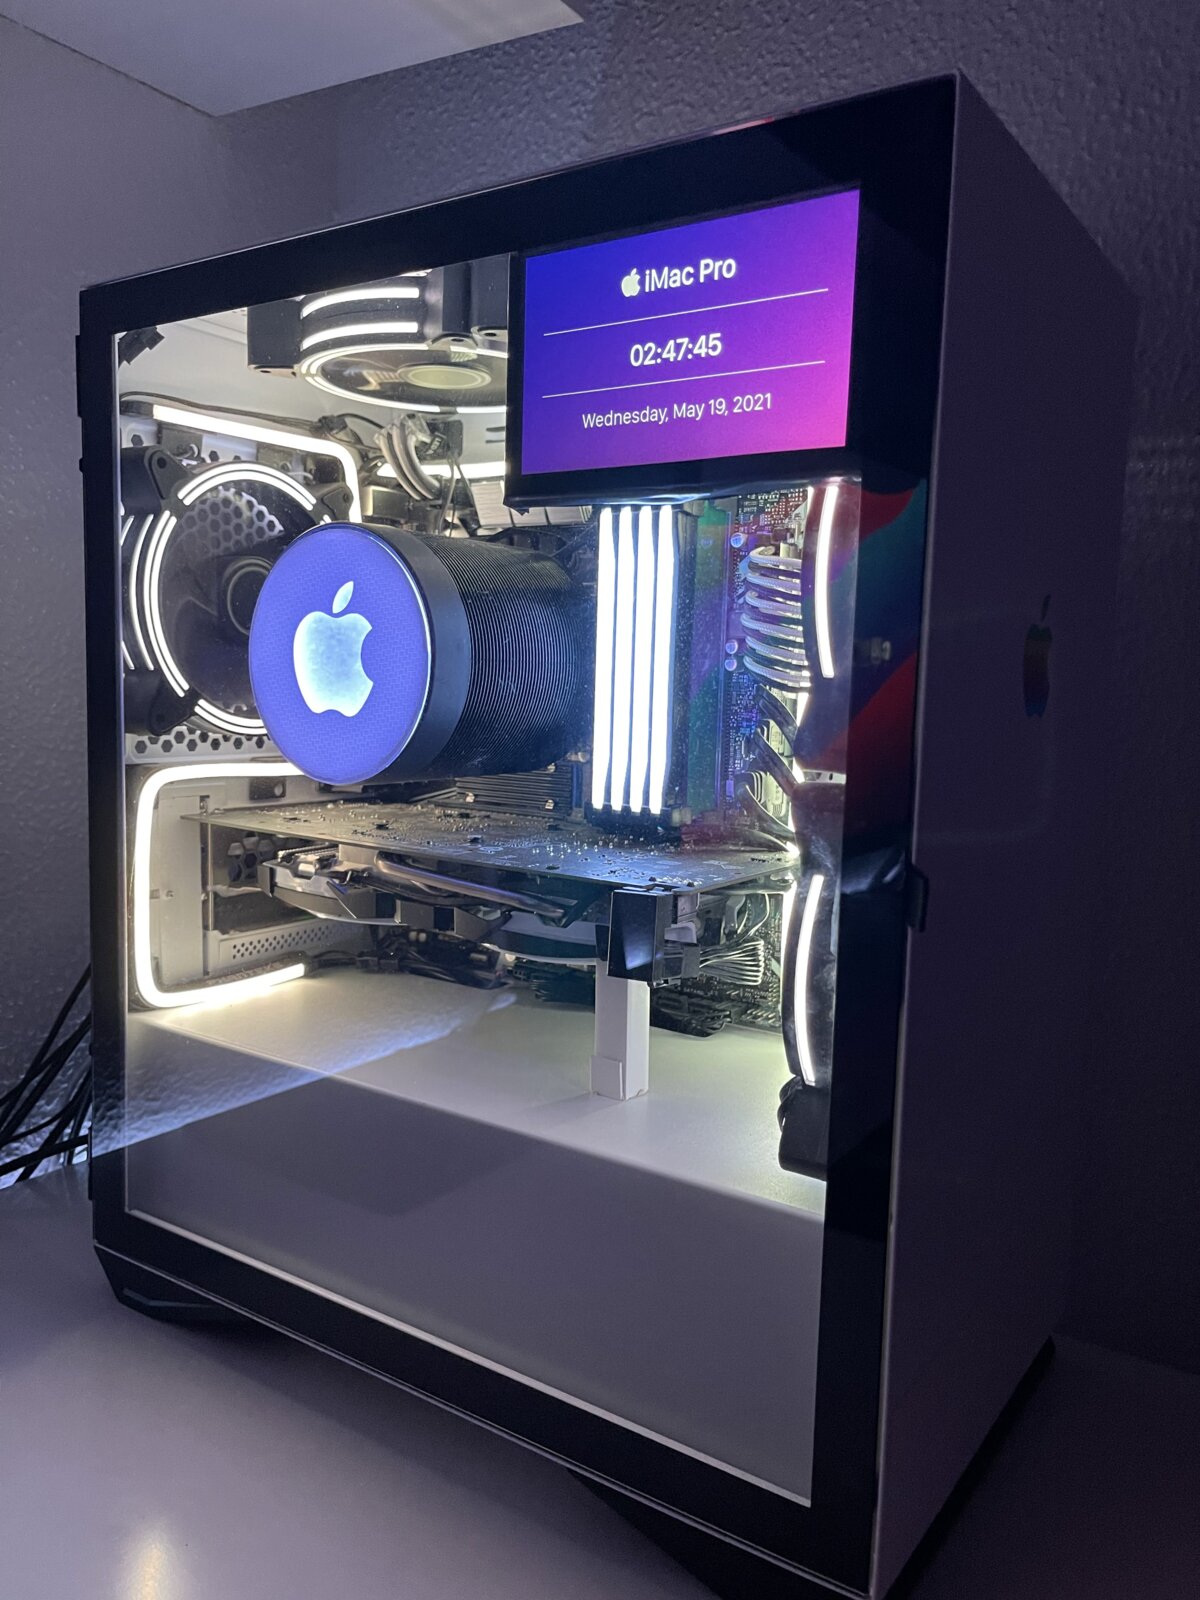
Closer Look (Mac Mode)
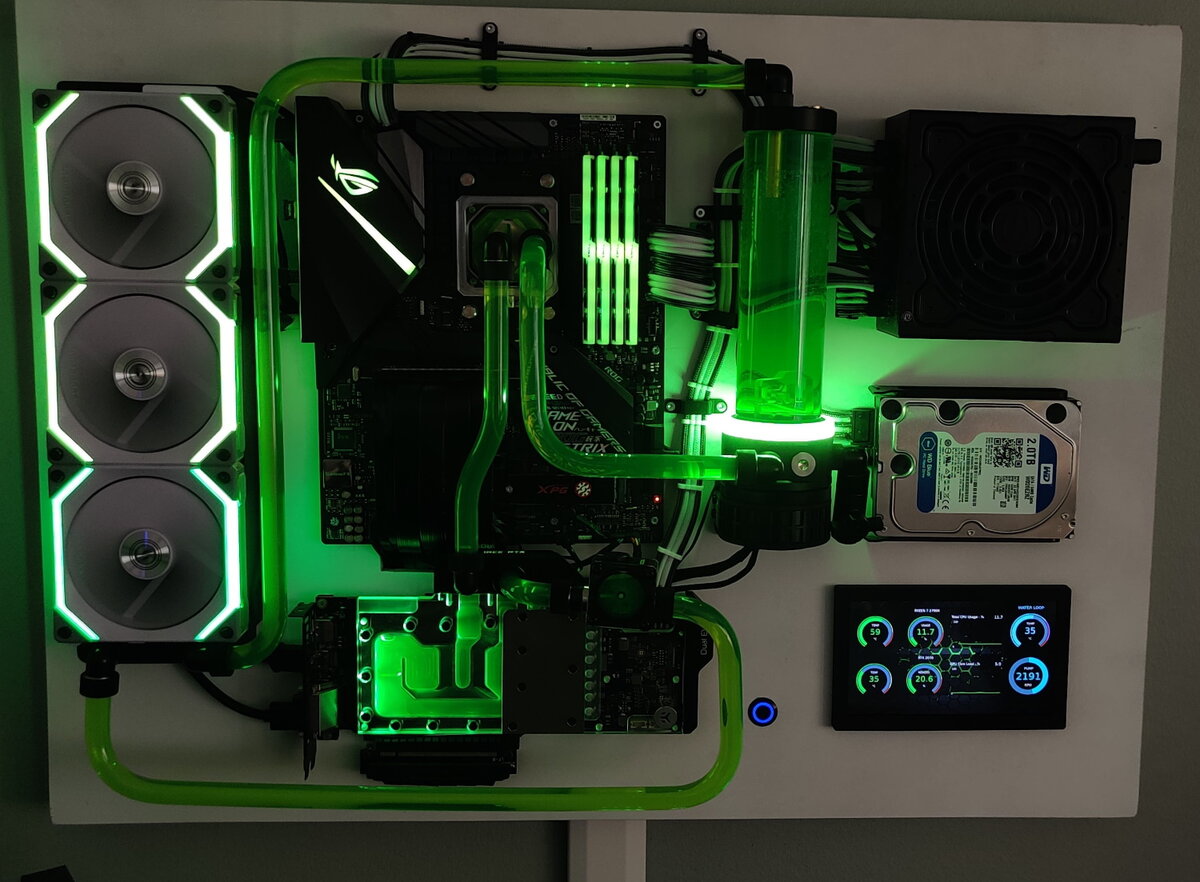
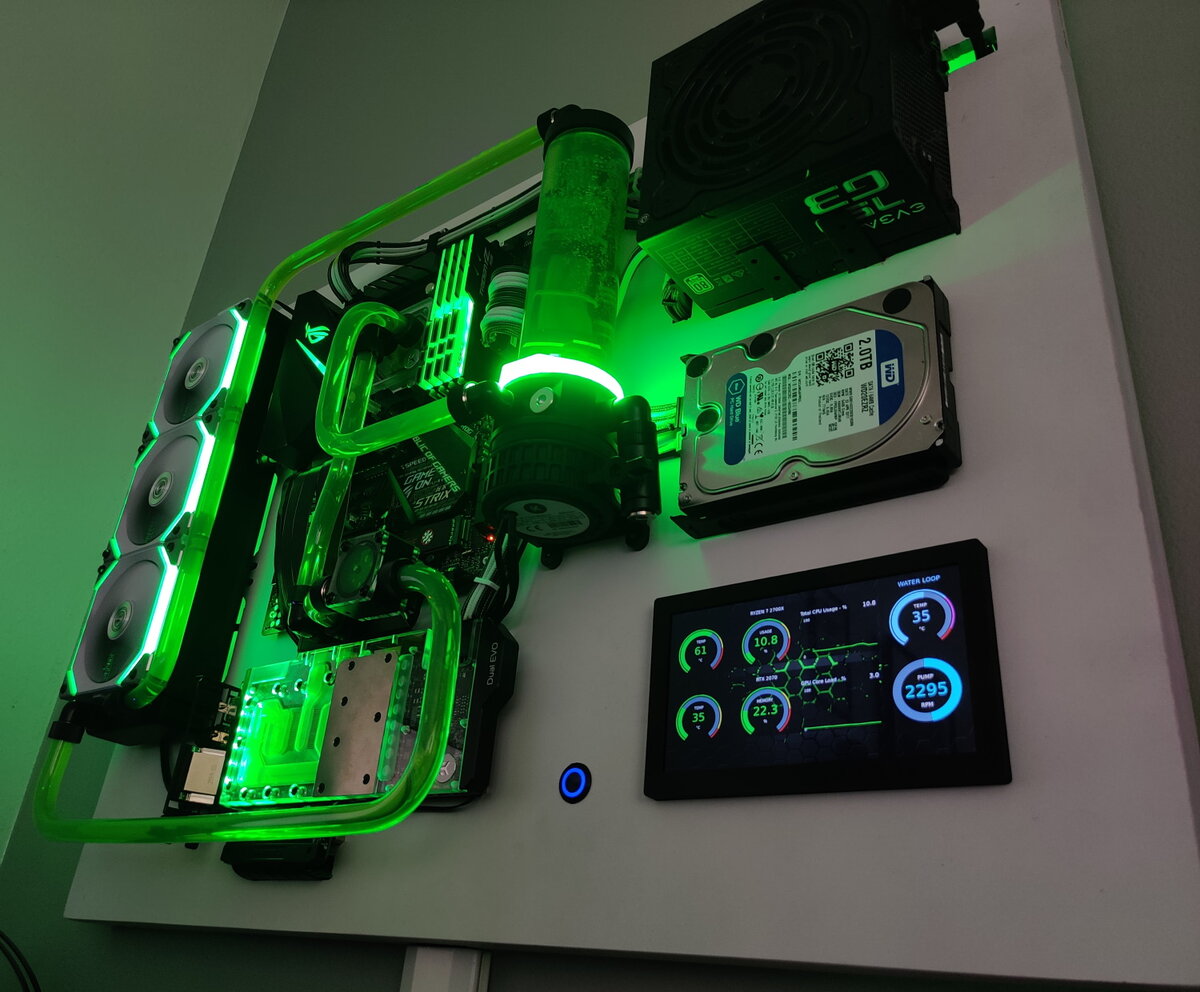
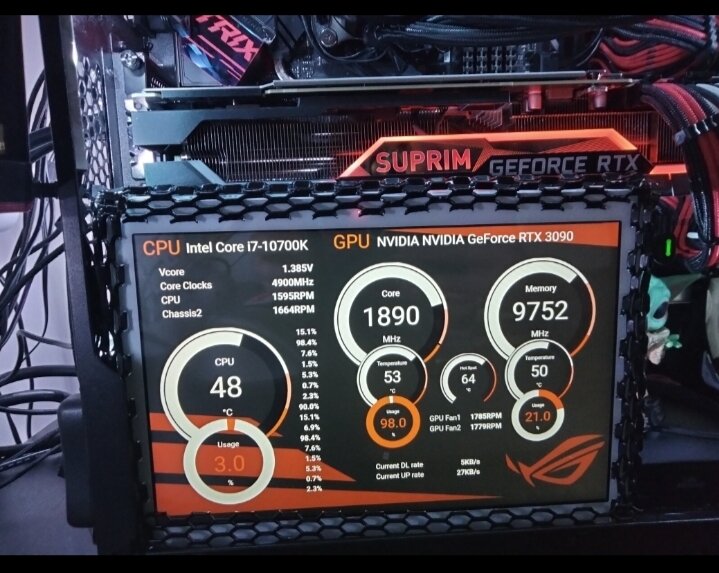
Hey guys, here's my wall PC build with my first custom theme as well. This project is pretty much as DIY as you can go. I made the “case”, cables and water cooling loop myself. I also wired my screen backlight to a PSU Molex connector so it turns off when the PC is turned off. RPi 3b+ gets its power separately from the wall. Screen is a waveshare 7" 1024x600 panel with a 3D printed frame.